Isn’t She Lovely?
Do you ever eye the chest of drawers dropped off at the end of someone’s lane with a “free” sign posted on it? Sure you do! This time, stop and take a closer look. It is a bit sad with a few dings and the wood is split in some places. The top is scratched, but just surface scratches and it has some faint coffee cup rings from someone not showing the respect this grand dame deserved. As you try to open the drawers, they won’t budge without a fight. Maybe from the wax buildup very apparent on all the surfaces.
The knobs for the top two smaller drawers are wood. One is half broken and the other one has crayon scribbles on it. Pulling on the handles of the drawers below, you can’t help but admire the hardware and how solid it feels even though the finish is worn and pitted from having been used time and time again.
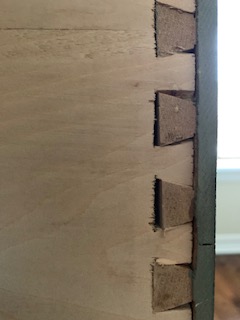
After muscling a drawer open, you see what once was beautiful paper-lined drawers that have faded and worn. Lifting back a corner of the paper, the wood drawer bottoms are in perfect condition. The drawers have dove-tail joints hinting at a quality find, a solid wood piece and most likely an antique!
Now you can’t bear to leave her at the curb and have visions of her painted apple green, fuscia or even bright yellow with new floral paper-lined drawers scented in lavender. You decide right then and there to take this beauty home and give her some tender-loving care. Never mind that you haven’t done this before. This will be my first project; you declare to yourself.
Going Home
Drawer-by-drawer and then the frame, with great difficulty you manage to fit her in your car. You are tired, sweaty and now have less seat room due to the passenger you just picked up. This time you are not feeling guilty for having left her there looking back forlornly in your rear-view mirror. This time you decided you’d found a piece that inspired you enough to take a chance.
Once home, your find is out of your car and now in your garage. You go and make yourself a cup of coffee to relax and muse about your discovery. You admire your find and given her heritage and appeal decide to secretly name her Evelyn after your great-aunt who loved antiques.
She Sits in your Garage
So, she sits in your garage, larger than she seemed at the curb. Evelyn is now taking space in your garage that is meant for your car. Time to figure out what priming you want to give Evelyn and then how to do it.
But you’ve never prided yourself as someone with vision and you’ve never upcycled a piece of furniture before. Pressure and doubt sit on your shoulders.
Your Vision
So start by determining what your vision is for your “new” piece of furniture? Pinterest is an excellent source to find ideas. Scrolling through it you will find so many possibilities; it is dizzying the choices you can make.
What you decide to do is specific to your find and your taste. But let me give you a helping hand for your first project. In this case, the top is in good shape other than scratches and coffee rings, so you can sand that out and stain the wood top. The carcass has some dings and splits, so they will need to be filled. The parts that have wood filler will be noticeable if you leave the wood natural or stain it, so painting the carcass is the way to go. The drawer fronts are all in great shape, so you can leave the wood show and stain it to match the top.
The two wood knobs need to be replaced and the drawer pulls, while great, have an uneven finish from wear over time. You could clean those and use them as is, spray paint them or try some new hardware. There are many online sources for great looking hardware in a myriad of choices. How about new glass knobs for the top drawers and new drawer pulls?
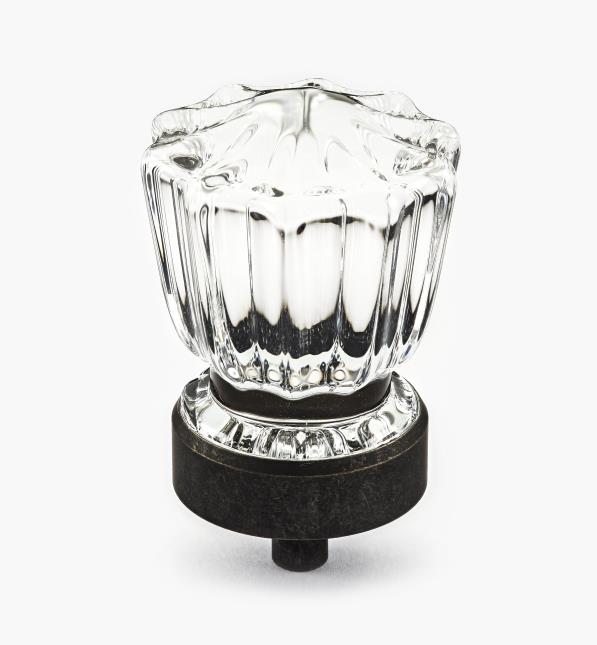
Faceted round bronze knob 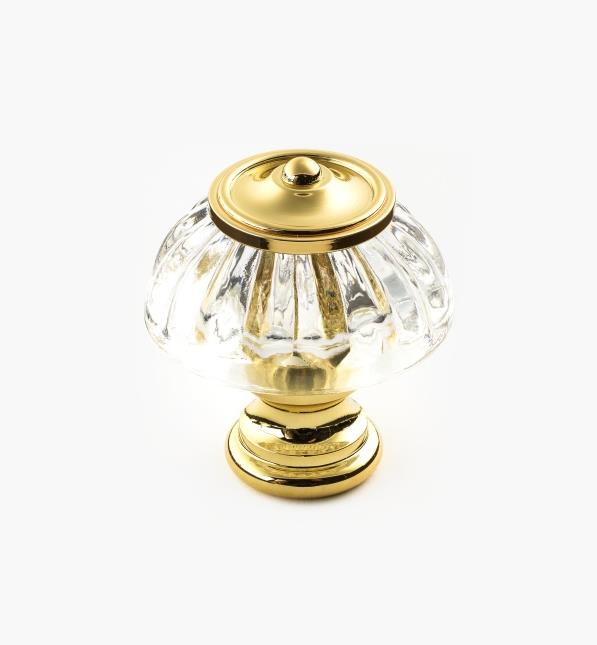
Round polished brass knob 
Octagon polished brass green knob
Get Evelyn Ready
Start by opening every drawer gently pulling to try to get them all to open. You never know what the previous owners might have left behind. Remove the liners and vacuum out the drawers to ensure no dust, dirt, pins, papers, pictures, clothing, etc. remain.
Remove the hardware, throw out the wood knobs and keep the drawer pulls where you know where to find them again. You can keep them for another piece they may be perfect for down the road.
Paint won’t adhere to dirt, grease or to wax. To remove the dirt and grease, try a green solution like Simple Green All-Purpose Cleaner, Green Works All-Purpose Cleaner or Zep Heavy Duty Citrus Degreaser There are many other options as well. While TSP, or trisodium phosphate, is a very effective heavy-duty cleaner, it is toxic. For health and environmental concerns, I’d rather not use it, nor you. The green solutions or TSP will start to wear at the wax, but mineral spirits will remove any wax buildup.
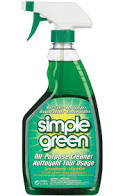
Simple Green All Purpose Cleaner 
Green Works All Purpose Cleaner 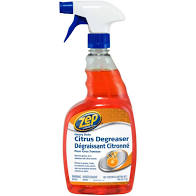
Zep Citrus Degreaser
Take out all the drawers and stand them up on the floor. Now you are ready to begin the serious work.
Wood Filler
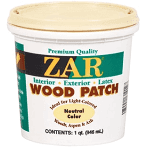
Because you want a nice even surface to paint, use a wood filler to fill in the dings and the splits on the sides. There are many to choose from. Wood Patch from Zar is a good one to try and is available from Amazon.ca, but there are others you can get at your local Home Depot or Lowes.
Follow the directions on the product you choose but know that it is better to apply a thin coat, sand and repeat as necessary rather than try to use one application of wood filler. You will need to be patient as the wood filler takes time to dry. But the time spent to fix the problem is worth it.
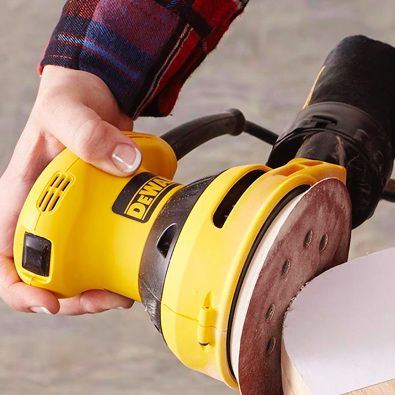
Sanding
Evelyn is a solid maple natural beauty. She has just a hint of stain and some wax, no poly on this girl! The top and the drawer fronts should be sanded down to bare wood. The cabinet frame, because it will be painted, doesn’t need to be sanded down to bare wood, but scuffed up enough so that the paint will adhere.
Sandpaper comes in different grits. The lower the number (e.g., 80), the coarser the paper; the higher the number (e.g., 220), the finer the paper. Start with a coarser paper and progress to a finer paper. Because Evelyn isn’t covered in polyurethane or thick paint, starting with a medium 120 or 150 grit paper would be fine and you can progress to a 220 fine grit paper to finish.
If you don’t mind a bit of elbow grease, sand the top by hand. If you’d rather the sander do the work, use a small orbital sander instead. When using an orbital sander, keep it moving and don’t use much pressure, otherwise you’ll have depressions in the wood. The drawer fronts can be done the same way.
Paint Choices
There are lots of options for paint: chalk, milk, mineral, latex, oil. Depending on the product, you can apply the paint with a sponge brush, a natural or synthetic brush, or use a sprayer. Evelyn is going to get a coat of Fusion Mineral Paint by Homestead House. It is a great choice for beginners because no finish product is needed. Fusion Mineral Paint is applied straight from the container using a synthetic brush or can be applied to larger surfaces using a microfibre roller. When painting, it is better to apply many thin coats than one thick coat. Use long brush strokes, little pressure and don’t go back into paint that has started to dry otherwise you will create ridges you’ll see and feel. Two coats is typical for a piece of furniture but will depend on what is being covered and the new colour being used. Fusion Mineral Paints website has tutorials for you to view how to apply their paint.
Stain Choices
Evelyn is going to have a beautiful rich stained top and drawer fronts. Wood stains are made by many manufacturers and are widely available. They are commonly available as liquid or gel and are water or oil based. You can apply them and let them set or apply them and then rub the excess away. You can apply as many coats of stain as you wish. The more coats you apply, the darker the colour.
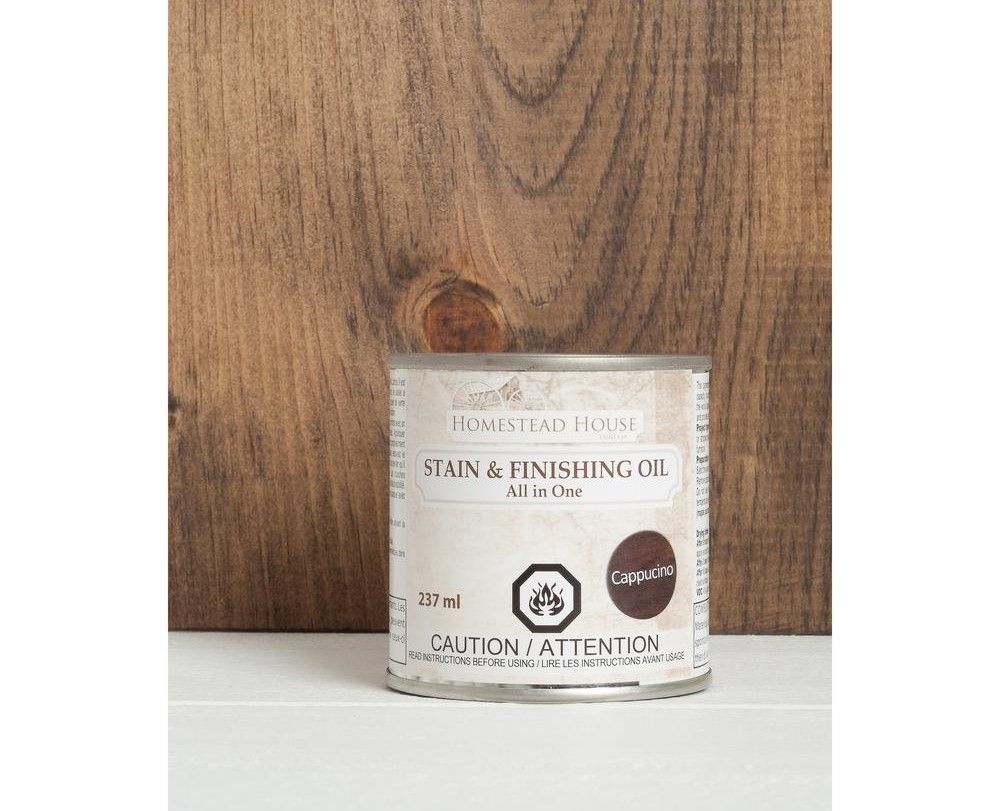
Because this is your first piece, make it easy on yourself and stay with Homestead House. They have a combined stain and finishing oil called Stain & Finishing Oil All in One Wood Finish. The Cappuccino is a gorgeous mid-tone colour. Apply to the top and drawer fronts with a wide foam brush and apply a generous amount. Then remove the excess by applying even pressure and going with the grain of the wood. Again, check their website for tips on how to apply the all in one stain and finish.
More Choices
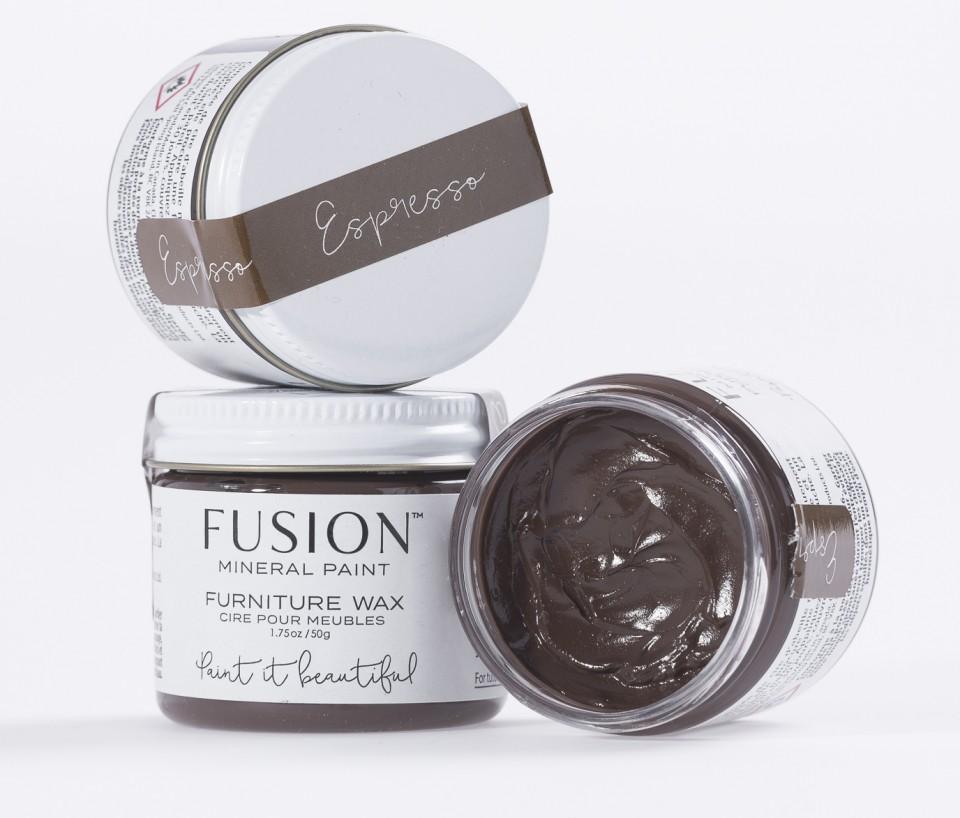
For painted pieces using Fusion Mineral Paints, no finish is needed making it a great choice for beginners. But because your piece is an antique, the painted finish may look too out of place particularly when there is detailed scrollwork, dentil molding, beading, etc. So, to finish your piece off, stick with Fusion Mineral Paints and use their Furniture Wax in Espresso. The wax is dark and when applied with a natural bristle brush and buffed with a rag, it softens the paint and will highlight the details of the furniture piece. There are other brands of finishing wax you could also try. It is a common product.
All Done
She’s all done now. Just add your new hardware and put in some new scented paper, and start to use your beauty, Evelyn. Your aunt would have loved her namesake and been proud of you.

Here is a link to a video from Fusion Mineral Paint that will give you a really good start to understanding how to refinish a furniture piece you own using some of their products. Check the web as there are countless tutorials from product manufacturers, retailers and do-it-yourselfers, to help you along the way.
